
Discover how to build a popsicle‑stick catapult with step‑by‑step PDF instructions. Perfect for kids who love target games, this DIY guide turns simple sticks into a powerful launcher. Follow the easy steps, test your skills, and enjoy safe, fun throwing! Enjoy building and launching safely today.!!!

Materials Needed
Gather the following items to build a sturdy popsicle‑stick catapult. Each component is chosen for durability, ease of sourcing, and safety during launch. The list below includes both basic supplies and optional extras that enhance performance or aesthetics.
- 30–40 popsicle sticks (1‑inch wide, 6‑inch long). Use the same size for a balanced base.
- 1 sturdy wooden board or thick cardboard (at least 12×12 inches) to serve as the launch platform.
- 1 rubber band or elastic strap (medium tension) for the arm’s pivot and for tensioning the launch.
- 1 small wooden dowel or metal rod (1/4‑inch diameter, 4‑inch length) to act as the arm pivot.
- 1 plastic bottle cap or metal disk (1‑inch diameter) to attach the launch arm.
- 3–4 small wooden blocks or plastic wedges for the base’s support legs.
- 1 strong adhesive (wood glue or hot glue) and a small brush or stick for application.
- 1 pair of safety goggles and a protective apron for safe handling.
- Optional: decorative paint, stickers, or colored tape to personalize the catapult.
- Optional: a small plastic bucket or container to catch projectiles.
All items can be sourced from a local craft store, hardware shop, or online marketplace. The use of non‑hazardous materials ensures a safe, educational experience for all ages.
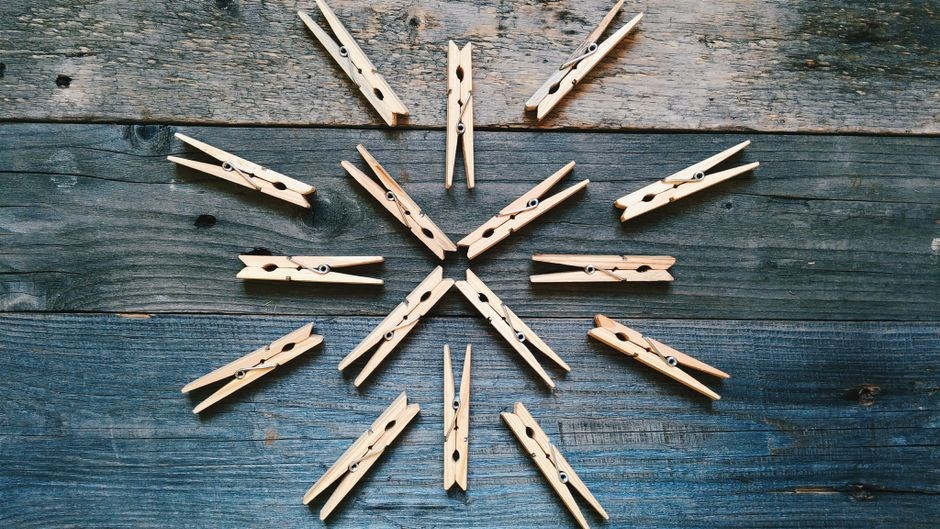
Feel free to experiment with stick lengths, rubber band tensions, or decorative themes to create a personalized catapult that sparks curiosity learning kids!
Tools Required
Gather the following items to build a sturdy popsicle‑stick catapult. Each component is chosen for durability, ease of sourcing, and safety during launch. The list below includes both basic supplies and optional extras that enhance performance or aesthetics.
- Scissors or small utility knife – for trimming excess stick ends and cutting rubber bands.
- Ruler or measuring tape – to ensure uniform stick lengths and precise spacing;
- Level or straight edge – to keep the base and arm aligned during assembly.
- Drill with a 1/4‑inch bit – optional, for creating a clean pivot hole in the wooden board.
- Screwdriver or small hammer – to secure the pivot rod and attach the launch arm.
- Wood glue or hot glue gun – for bonding sticks and securing the base structure.
- Sandpaper (120‑grit) – to smooth rough edges and prevent splinters.
- Safety goggles and gloves – essential for protecting eyes and hands during cutting and drilling.
- Cleaning wipes or cloth – to keep the work area free of glue residue and debris.
All tools should be child‑friendly and supervised during use. By preparing these items ahead of time, you’ll streamline the build process and ensure a safe, enjoyable project for everyone involved.
Use base, fun.
Keep the base level and stable by placing it on a non‑slip surface or sturdy board. Adjust rubber band tension gradually, testing launch to find the optimal range. Always supervise children during use!

Safety Guidelines
Before building and launching a popsicle‑stick catapult, follow these essential safety steps. Keep the workspace clean, use protective gear, and supervise children at all times. Proper handling of tools and materials prevents accidents and ensures a fun, secure experience.
- Wear safety goggles and gloves to protect eyes and hands from splinters, glue fumes, and rubber band snaps.
- Use a stable, flat surface for assembly. Place the base on a non‑slip mat or sturdy board to avoid tipping during launch.
- Secure the launch arm firmly to the pivot rod with screws or strong adhesive. Loose joints can cause sudden releases and injuries.
- Maintain clear launch zones by marking a safe distance with cones or tape. Ensure no one stands within the projected flight path.
- Never aim at people or pets. Use soft projectiles like foam balls or paper discs to reduce impact force.
- Gradually increase tension on the rubber band. Test launches in short bursts, adjusting tension until the desired range is achieved.
- Store the catapult and parts in a dry, cool place to prevent warping or glue degradation.
- Dispose of rubber bands and sticks responsibly after use to avoid litter and potential hazards.
Keep the catapult safe in a zone.
Adhering to these guidelines ensures a safe, educational, and enjoyable catapult‑building project for all ages.
Construction Steps
Start by gluing four popsicle sticks into a square base. Attach a pivot rod through the center. Build a lever arm from two sticks, secure with a rubber band. Add a sling, then test and adjust tension for optimal launch distance. Ensure parts are secure launch now!!
Step 1: Build the Base
Begin by selecting four sturdy popsicle sticks of equal length. Arrange them in a square, aligning the ends to form a perfect 90‑degree corner at each joint. Apply a generous amount of wood glue to the contact surfaces, ensuring a strong bond. Use a small clamp or a heavy object to hold the sticks together while the glue dries. Once the glue has set, reinforce the corners with a thin strip of masking tape or a second layer of glue for added durability. Next, drill a small hole (about 3 mm in diameter) through the center of the square, aligning it with the middle of each stick. This hole will serve as the pivot point for the catapult arm. Insert a 3 mm steel pin or a sturdy rubber band through the hole to create a stable pivot. Finally, test the base by gently rocking it to ensure the pivot is smooth and the structure remains rigid. A solid base is essential for consistent launches and prevents wobble during operation. Keep the base level and secure before proceeding to the next step.
Remember to test the base stability by applying a small weight to the arm and observing any wobble. Adjust the pivot pin if necessary, tightening it with a small screwdriver or adding a rubber band for extra grip. Document your measurements for future iterations, noting the angle of the arm and the tension of the rubber band. This data will help you fine‑tune the catapult for maximum distance and accuracy. Enjoy experimenting with weights launch angles to explore physics of motion and precision.
Step 2: Assemble the Arm
Choose a popsicle stick that will serve as the launching arm. The stick should be slightly longer than the base square to allow for a clear arc. Apply a generous line of wood glue along one edge of the stick, then press it into the pivot hole created in Step 1. Ensure the arm sits at a 45‑degree angle to the base for optimal launch velocity. Use a small clamp or a piece of string to hold the arm while the glue dries. Once the glue has set, reinforce the joint by wrapping a thin strip of masking tape around the pivot area, providing extra stability. Next, attach a rubber band to the free end of the arm. Loop the rubber band through the arm’s tip and secure it with a small screw or a second popsicle stick acting as a clamp. This rubber band will store the potential energy needed for each throw. Test the arm by gently pulling it back and releasing it; the arm should swing smoothly without binding. Adjust the tension of the rubber band until the arm returns to its neutral position in a single, clean motion. Record the arm’s length and the amount of rubber band stretch for future calibration. Ensure the arm’s pivot is centered and that the arm does not wobble when the base is shaken. A well‑assembled arm is crucial for consistent projectile trajectories and accurate distance measurements; Finally, inspect the entire assembly for any loose joints or uneven surfaces. Tighten any loose screws and ensure the rubber band is not overstretched. Mark the launch point with a small flag or sticker so you can consistently aim. Store the catapult in a dry place to prevent warping. When ready, load a lightweight projectile, pull back the arm, and release for a satisfying launch experience that blends physics and play.
Step 3: Attach the Lever
After the arm is secured, the next critical component is the lever that will transfer the stored energy from the rubber band to the projectile. Select a second popsicle stick that is slightly shorter than the arm to act as the lever. Position the lever so that its center aligns with the pivot point of the arm. Apply a bead of wood glue along the side of the lever that will rest against the arm’s pivot. Press the lever into place, ensuring that the glue line is even and that the lever sits flush against the arm. Allow the glue to dry for at least 30 minutes before proceeding. Once the glue has set, reinforce the connection by wrapping a thin strip of masking tape around the joint. This tape will provide additional shear strength and prevent the lever from slipping during repeated launches. Attach a small rubber band to the free end of the lever. Loop the rubber band through the lever’s tip and secure it with a tiny screw or a second popsicle stick acting as a clamp. The rubber band should be taut enough to maintain tension but not so tight that it strains the wood. Test the lever by pulling it back gently; the lever should pivot smoothly around the arm’s pivot point. Adjust the length of the lever if necessary to fine‑tune the launch angle. Mark the lever’s pivot point with a small sticker or a piece of colored tape so that you can consistently align the lever during assembly. Store the lever in a dry place to avoid warping. When the lever is properly attached, load a lightweight projectile into the launch cradle, pull the lever back, and release for a satisfying launch that demonstrates the principles of simple machines and energy transfer. This step ensures that the catapult’s power is efficiently transferred from the stored elastic potential energy in the rubber band to the kinetic energy of the projectile, resulting in consistent and accurate throws. Remember to keep the lever’s surface clean and free of debris to maintain optimal performance over time. Fine‑tune the lever by adjusting rubber band tension. Higher tension gives higher velocity but less accuracy; lower tension improves accuracy but reduces range; Adding a small counterweight to the lever’s free end balances the system. Experiment and record lever length, tension, counterweight mass, and launch distance to refine performance consistently!
Step 4: Install Release Mechanism
To ensure consistent launches, the release mechanism must be precise and reliable. Begin by selecting a small wooden dowel that fits snugly into the arm’s notch. Drill a shallow hole at the base of the arm, just above the pivot, and insert the dowel. Apply epoxy around the dowel’s insertion point, then clamp the arm to the base for 10 minutes to secure the joint. Create a trigger plate from thin plywood or sturdy cardboard. Cut a rectangular slot that matches the dowel’s width, and attach the plate to the arm screw or strong adhesive. The plate should slide smoothly along the dowel when the arm is pulled back, storing elastic potential energy in the rubber band. Attach a small rubber band or elastic strap to the trigger plate’s free edge to act as a safety latch, preventing premature release. When the arm is fully cocked, the latch holds the plate in place. Release the latch by pulling a thin string or small lever connected to the latch. The string anchors to the base and pulls to disengage the latch, allowing the arm to snap forward. Test the mechanism by pulling the arm back to full tension, then gently pulling the string. The arm should release smoothly, with minimal wobble. Adjust the latch strap tension if the arm releases too early or too late. Lubricate all moving parts with silicone spray. Mark the arm’s fully cocked position with a small sticker or colored dot on the base; This visual cue helps you consistently achieve the same launch angle and distance during practice. The release mechanism’s reliability is critical for accurate targeting and safety, so double‑check all fasteners and seals before each use. Adjustments to the release point are easy. The system allows quick adjustments to the release point for varied trajectories.
Step 5: Fine-Tune Tension
Fine‑tuning tension turns a launcher into a precision tool. Start by measuring the launch distance with a tape measure and recording the result for several trials. Attach an adjustable clamp or screw‑type tensioner to the rubber band’s anchor. Loosen the clamp to increase slack, retest, and repeat until the distance matches your target. Use a calibrated spring scale: attach it to the band’s free end, pull until the desired reading appears, and mark that value. If the catapult overshoots, tighten the clamp or add a short elastic segment; if it undershoots, loosen the clamp or add a longer segment. Keep the band’s length consistent by cutting it to a uniform size before each adjustment and verifying with a ruler. Monitor the band’s color; a bright yellow band indicates it’s near its elastic limit—replace it if it turns orange or red. Once the tension feels stable, secure the clamp with double‑sided tape to prevent accidental loosening. Perform test launches at different angles to confirm consistency across the arc.
- Measure initial distance.
- Adjust clamp or tensioner.
- Retest and record.
- Use spring scale for precision.
- Mark desired tension.
- Fine‑tune with elastic segments.
- Check band color for safety.
- Secure clamp with tape.
- Test across angles.
- Document final setting.
- Check band tension after each launch.
- Adjust clamp as needed.
Store the catapult in a dry, cool place when not in use. If power drops, replace the band. Use a high‑quality synthetic band for durability, allowing higher launch speeds safely. During each test, note the angle and distance. Keep the logs organized. Always wear goggles during testing

Testing & Calibration
Fine‑tuning tension is critical for repeatable launches. Attach a calibrated spring scale to the rubber band’s free end and pull until the scale reads the desired tension value. Mark this value on the band or in your log. Perform a series of test shots at the calibrated angle, noting the landing spot each time. If the projectile lands too far or too short, adjust the tension by tightening or loosening the band in 0.5‑N increments. After each adjustment, retest and record the new distance. Continue this iterative process until the launch distance falls within ±5 cm of the target center across at least five consecutive shots. Once calibrated, lock the band in place with a small screw or a rubber clamp to prevent drift during use.!
Common Issues & Troubleshooting
Common problems arise from weak joints, over‑tensioned bands, or uneven base alignment. If the launch arm feels loose, tighten the screw that holds the pivot or replace the wooden dowel with a sturdier one. Over‑tension can cause the rubber band to snap; check the band’s stretch by measuring the distance between the anchor points and recommended limit. Uneven base alignment will throw the projectile off‑target; use a level to verify that the catapult sits flat on the surface. When the projectile lands in a different direction than expected, inspect the angle of the arm; a slight tilt can dramatically alter trajectory. If the rubber band detaches during launch, secure it with a small clamp or a piece of tape to prevent slippage. A warped base can also lead to inconsistent launches; replace or reinforce the base with additional sticks to restore rigidity. Finally, if the catapult seems to lose power after repeated use, replace worn rubber bands and check for any cracks in the wooden components. By systematically addressing these issues, you can maintain reliable performance and enjoy safe, accurate launches every time. Remember that consistent performance depends on a balanced tension, proper arm length, and launch angle. Small tweaks—tightening the pivot screw a quarter turn, adding a 2‑mm spacer, or adjusting the rubber band’s attachment—can shift launch distance by several centimeters. Log each test’s tension, angle, and range to spot trends and refine accuracy for fun. and play.!

Printable PDF Templates
For enthusiasts who prefer a ready‑made layout, the downloadable PDF templates provide a complete blueprint for the popsicle‑stick catapult. Each page includes precise measurements, cut lines, and assembly instructions, allowing you to print, cut, and assemble with minimal effort. The templates are available in both A4 and letter sizes to accommodate different printers and paper stocks. The design features a modular base that can be adjusted for height, ensuring stability on uneven surfaces. The arm assembly is illustrated with clear arrows indicating pivot placement and rubber‑band attachment points. A dedicated section explains how to select the optimal rubber‑band thickness and length for desired launch distance, while a troubleshooting chart highlights common pitfalls such as over‑tightening or misaligned joints. Users can also find a printable tension‑meter guide, which helps calibrate the catapult’s spring tension for consistent performance. The PDF includes a safety checklist, reminding users to wear eye protection and to keep the launch area clear of bystanders. For those who enjoy customization, the template offers optional slots for decorative stickers or paint, enabling a personalized aesthetic without compromising structural integrity. The file is compressed into a single PDF to simplify downloading and printing, and it is compatible with standard PDF readers on Windows, macOS, and Linux. By following the step‑by‑step visual cues, even novices can assemble a functional catapult in under an hour. The templates also serve as an educational tool, illustrating principles of lever mechanics, tension energy, and projectile motion. Download the PDF, print the pages, cut along the dotted lines, and assemble the sticks with glue or small nails as indicated. Once assembled, test the catapult with light projectiles such as paper balls or small beans to fine‑tune the launch angle. The result is a reliable, repeatable launcher that can be used for backyard target practice, classroom demonstrations, or simply for the joy of engineering. Enjoy building, launching, and learning with this comprehensive, user‑friendly PDF guide!!

Educational Applications
Building a popsicle‑stick catapult offers hands‑on lessons in physics, engineering, and teamwork. Students can explore lever mechanics, measuring release angles, and calculating projectile ranges. The project encourages iterative design: students tweak arm length, rubber‑band tension, and base stability, then test results and record data. This cycle reinforces scientific method skills and critical thinking. In math classes, students measure distances, compute averages, and graph launch angles versus range, providing real‑world context for trigonometry and algebra. Science labs use the catapult to demonstrate energy conversion discuss mass and launch speed.! Art and design teachers can incorporate aesthetic elements, allowing students to decorate the frame while maintaining structural integrity. Group projects foster collaboration, as students assign roles—designer, builder, tester, data analyst—mirroring professional engineering teams. The activity also supports STEM outreach, engaging younger learners with a tangible, exciting experiment that sparks curiosity. Teachers can adapt difficulty levels: simple single‑stick arms for beginners or multi‑segment levers for advanced projects. Assessment can include reflective journals, peer reviews, and presentation of findings. By integrating the catapult into curricula, educators provide a multidisciplinary platform that blends theory with practice, inspiring students to pursue further study in science, technology, engineering, and mathematics.