Honeywell T6 Installation Manual PDF: A Comprehensive Guide
Discover essential guidance for your Honeywell T6 Pro, including setup, operation, and troubleshooting – all readily available in a downloadable PDF format today!
Understanding the Honeywell T6 Series
The Honeywell T6 Series represents a significant advancement in smart home climate control․ These programmable thermostats, including the T6 Pro, offer users enhanced comfort and energy savings․ They are designed for ease of use, featuring intuitive interfaces and remote control capabilities via Wi-Fi connectivity․
Key features include customizable schedules, geofencing, and smart alerts․ The T6 series is compatible with a wide range of heating and cooling systems, making it a versatile choice for many homes․ Understanding the specific model within the T6 series is crucial for a successful installation, and the provided PDF manual details these nuances․ Honeywell International is a diversified technology and manufacturing company․
Downloading the Honeywell T6 Installation Manual PDF
Accessing the official Honeywell T6 Installation Manual PDF is straightforward․ Begin by visiting the Honeywell Support Website, the primary source for all documentation․ Search for “Honeywell T6 Installation Manual” or the specific model number (e․g․, T6 Pro)․
Look for a dedicated “Downloads” or “Support” section on the product page․ The PDF manual is typically available for free download without registration․ Ensure you download the correct manual corresponding to your thermostat model․ Saving a copy to your device allows for offline access during installation․ Remember to review the entire document before beginning the installation process for optimal results․
Safety Precautions Before Installation
Prioritize safety during Honeywell T6 thermostat installation․ Always disconnect power to your HVAC system at the breaker box before commencing any wiring work․ This prevents electrical shock and potential damage to the system․ Verify the power is off using a non-contact voltage tester․
Exercise caution when handling wires, avoiding any frayed or damaged insulation; If you are uncomfortable working with electrical wiring, consult a qualified HVAC technician․ Never attempt installation during wet or damp conditions․ Proper grounding is crucial; ensure all connections are secure․ Review the manual’s safety warnings thoroughly before starting․
Tools Required for Installation
Successful Honeywell T6 installation necessitates specific tools․ A Phillips head screwdriver is essential for mounting the base plate and thermostat․ Wire strippers are crucial for preparing the thermostat wires for secure connections․ A small, flathead screwdriver may be needed for terminal screws․
A non-contact voltage tester verifies power is off before wiring․ Pliers can assist with wire manipulation․ A level ensures the thermostat is mounted straight․ A drill with appropriate bits might be required for new mounting holes․ Finally, a digital multimeter can aid in troubleshooting, and a pencil for marking wire locations is helpful․

Installation Steps
Begin by safely removing your old thermostat, then carefully wire the Honeywell T6 base plate, mount it securely, and attach the display․
Step 1: Removing the Old Thermostat
Before starting, power off your HVAC system at the breaker to avoid electrical shock․ Carefully remove the cover of your existing thermostat, often by gently prying it off or releasing clips․ Take a clear photograph of the existing wiring connections – this is crucial for accurate re-installation․ Label each wire with the corresponding terminal letter using the provided labels, ensuring a secure attachment․
Disconnect the wires one at a time, avoiding any shorts․ Once all wires are disconnected, carefully remove the old thermostat baseplate from the wall․ Inspect the wall for any damage and address it before proceeding․ Proper documentation of the existing wiring is paramount for a smooth transition to your new Honeywell T6 thermostat․
Step 2: Wiring the Honeywell T6 Thermostat
Using your previously taken photograph and labels, identify each wire’s function․ Common wires include R (power), C (common), W (heating), Y (cooling), and G (fan)․ Refer to the Honeywell T6 wiring diagram in the manual for precise terminal locations․ Carefully insert each labeled wire into the corresponding terminal on the T6 base plate․
Ensure each wire is securely fastened – a loose connection can cause malfunctions․ Gently tug on each wire to confirm it’s firmly held in place․ Double-check all connections against your wiring diagram before proceeding․ Incorrect wiring can damage your HVAC system, so accuracy is vital during this step․
Identifying the Wires
Before disconnecting the old thermostat, carefully photograph the existing wiring connections․ This visual record is invaluable for accurate re-wiring․ Next, use a small piece of tape and a pen to label each wire corresponding to its terminal designation (R, C, W, Y, G, etc․)․
Common wire colors aren’t standardized, so relying on labels is crucial․ Typically, R is red (power), C is blue or black (common), W is white (heating), Y is yellow (cooling), and G is green (fan)․ However, always verify with the terminal markings on your old thermostat․ Documenting this step prevents confusion and ensures a smooth installation process․
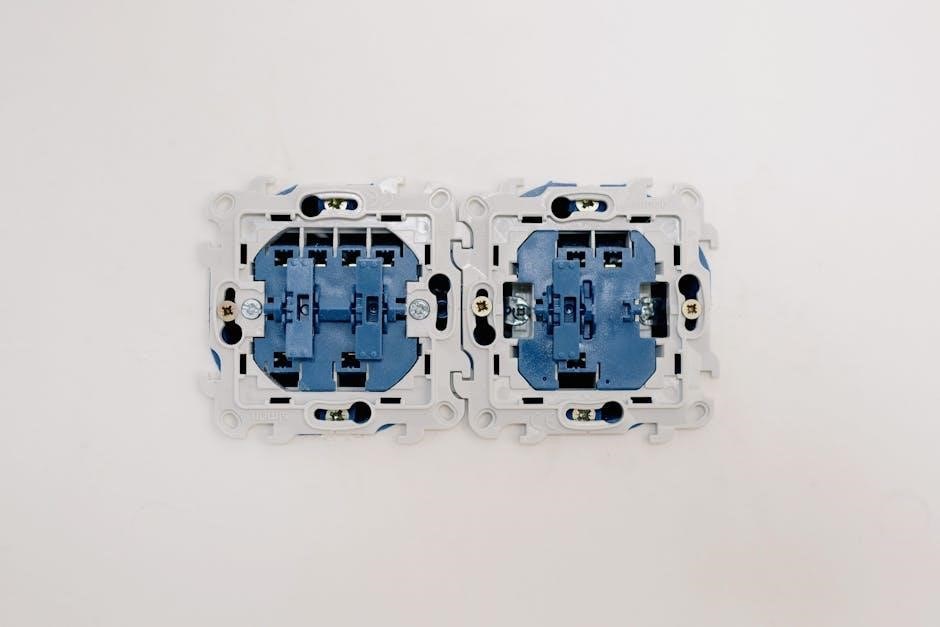
Connecting the Wires to the Base Plate
Using your labeled wires and the Honeywell T6 base plate, carefully insert each wire into the corresponding terminal․ Ensure the wires are fully inserted and securely fastened – a gentle tug confirms a solid connection․ Avoid stripping the wires excessively, as exposed copper can cause shorts․
Double-check that each wire matches the terminal designation from your previous documentation․ Incorrect wiring can damage the thermostat or your HVAC system․ If you encounter difficulty, consult the wiring diagram included with the T6 or refer to the Honeywell support website for assistance․ Secure connections are paramount for reliable operation․
Step 3: Mounting the Base Plate
With the wires securely connected, carefully position the Honeywell T6 base plate on the wall where your old thermostat was located․ Utilize the provided screws and wall anchors to firmly attach the base plate․ Ensure the base plate is level for proper thermostat display alignment․
If mounting to drywall, use the included wall anchors for a secure hold․ For mounting to a stud, screws can be driven directly into the wood․ Verify the base plate is stable and doesn’t wobble before proceeding․ A properly mounted base plate is crucial for the thermostat’s long-term stability and functionality․
Step 4: Attaching the Thermostat Display
Gently align the Honeywell T6 thermostat display with the mounted base plate․ Press the display firmly onto the base plate until it clicks into place, ensuring a secure connection․ Verify that the display is fully seated and flush against the base plate; any gaps could indicate an improper attachment․
Once attached, briefly test the display by powering on the system․ Confirm the screen illuminates and responds to touch․ If the display doesn’t power on, double-check the wiring and the base plate connection․ A secure and functional display attachment completes the physical installation process․

Configuration and Setup

Begin customizing your Honeywell T6! Configure Wi-Fi, date, time, and heating/cooling schedules for optimal comfort and energy efficiency – easily managed via the PDF․
Initial Power-Up and System Check
Upon initial power-up, the Honeywell T6 thermostat should display a welcome screen and begin a self-test․ Verify the display is clear and responsive․ Consult the installation manual PDF to understand the initial prompts and system check procedures․ Ensure the thermostat correctly identifies your heating and cooling system type – forced air, heat pump, or radiant․
Confirm proper wiring by checking that the thermostat requests configuration settings relevant to your system․ If errors appear, immediately power down the system and re-examine the wiring connections, referencing the wiring diagrams within the PDF guide․ A successful system check indicates the thermostat is communicating correctly with your HVAC equipment, preparing it for personalized configuration․
Connecting to Wi-Fi
To unlock smart features, connect your Honeywell T6 thermostat to your home Wi-Fi network․ Access the network settings through the thermostat’s display menu, guided by the detailed instructions in the installation manual PDF․ The thermostat will scan for available networks; select yours and enter the password using the on-screen keyboard․
Refer to the PDF for troubleshooting common connection issues, such as incorrect passwords or weak signal strength․ A stable Wi-Fi connection enables remote control via the Honeywell Home app, allowing you to adjust temperatures, create schedules, and receive alerts from anywhere․ Successful connection is confirmed by a Wi-Fi icon appearing on the thermostat display․
Setting the Date and Time
Accurate date and time settings are crucial for proper scheduling and operation of your Honeywell T6 thermostat․ Consult the installation manual PDF for precise instructions on navigating the thermostat’s menu to access these settings․ You can typically adjust the date and time manually, or enable automatic synchronization via your Wi-Fi connection;
The PDF provides guidance on selecting the correct time zone and ensuring the 12/24-hour format is set to your preference․ Incorrect date or time settings can disrupt programmed schedules and affect the thermostat’s overall performance․ Verify these settings after initial installation and after any power outages․
Programming the Heating and Cooling Schedule
Maximize energy savings and comfort by programming a customized heating and cooling schedule using your Honeywell T6 thermostat․ The installation manual PDF details how to create different schedules for weekdays and weekends, or even individual days․ You can set specific temperatures for various time periods throughout the day – wake, leave, return, and sleep․
The PDF will guide you through creating multiple program periods, adjusting hold temperatures, and utilizing temporary overrides․ Explore features like Smart Response to learn how the thermostat adapts to your home’s heating and cooling patterns․ A well-programmed schedule ensures optimal comfort and reduced energy consumption․
Troubleshooting Common Issues
Resolve typical problems like power failures, Wi-Fi connectivity, or inaccurate readings with the Honeywell T6 manual’s detailed troubleshooting section – available in PDF form․
Thermostat Not Powering On
If your Honeywell T6 thermostat fails to power on, consult the installation manual PDF for systematic troubleshooting․ First, verify the power supply at the furnace or HVAC system, ensuring the circuit breaker hasn’t tripped․
Next, double-check all wiring connections at both the thermostat baseplate and the HVAC unit, referencing the wiring diagram within the PDF guide․ A loose or incorrect wire can prevent power-up․ Confirm the C-wire (common wire) is properly connected, as it’s crucial for consistent power;
If the wiring appears correct and the power supply is active, the thermostat itself may be faulty․ The PDF manual provides contact information for Honeywell support, offering further assistance and potential replacement options․ Always prioritize safety and disconnect power before inspecting wiring․
Wi-Fi Connection Problems
Experiencing Wi-Fi connectivity issues with your Honeywell T6? The installation manual PDF offers detailed guidance․ Begin by verifying your home Wi-Fi network is functioning correctly with other devices․ Ensure the thermostat is within range of your router; signal strength diminishes with distance and obstructions․
Consult the PDF for specific instructions on resetting the thermostat’s Wi-Fi module․ Double-check you’re entering the correct Wi-Fi password, paying attention to capitalization․ Some routers may require enabling WPS or adjusting security settings for compatibility․
If problems persist, refer to the Honeywell support website (detailed in the PDF) for troubleshooting tools and FAQs․ A temporary router restart can sometimes resolve connectivity conflicts․ The manual also outlines potential interference sources․
Incorrect Temperature Readings
If your Honeywell T6 displays inaccurate temperature readings, the installation manual PDF provides diagnostic steps․ First, verify the thermostat isn’t directly exposed to sunlight, drafts, or heat-generating appliances, as these can skew results․ Ensure proper airflow around the device isn’t obstructed․
The PDF details how to calibrate the temperature sensor within the thermostat’s settings․ This allows you to offset the reading to match a trusted thermometer․ Check for proper wiring connections, as loose wires can cause erratic behavior․
Refer to the manual’s troubleshooting section for guidance on identifying potential sensor failures․ Honeywell’s support website (linked in the PDF) offers further assistance and potential replacement options if calibration doesn’t resolve the issue․

Additional Resources
Explore Honeywell’s official support website and comprehensive FAQ section within the installation manual PDF for further assistance and detailed troubleshooting guidance․
Honeywell Support Website
Access a wealth of information and direct support through the official Honeywell website․ This online resource provides a dedicated section for the T6 thermostat series, offering downloadable manuals – including the crucial installation PDF – alongside frequently updated troubleshooting guides․
You’ll find detailed specifications, compatibility information, and helpful video tutorials demonstrating installation and configuration processes․ The website also features a robust support forum where users can exchange tips and solutions․
For personalized assistance, Honeywell offers live chat support and a contact form to submit inquiries directly to their technical support team․ Ensure you have your thermostat’s model number readily available when contacting support for faster service․ The Honeywell website is a central hub for all your T6 needs․
Frequently Asked Questions (FAQ)
Q: Where can I find the Honeywell T6 installation manual PDF? A: It’s readily available on the official Honeywell support website, typically within the ‘Downloads’ or ‘Support’ section for your specific T6 model․
Q: Can I install the T6 thermostat myself? A: Yes, many homeowners can, but careful adherence to the installation manual PDF is crucial․ If unsure, professional installation is recommended․
Q: What if my T6 isn’t connecting to Wi-Fi? A: Double-check your network credentials and ensure a strong signal․ Refer to the troubleshooting section within the installation manual PDF for detailed steps․
Q: Is the T6 compatible with all HVAC systems? A: Compatibility varies․ Consult the manual PDF or Honeywell’s compatibility checker online before purchasing․